
Covered Bridge
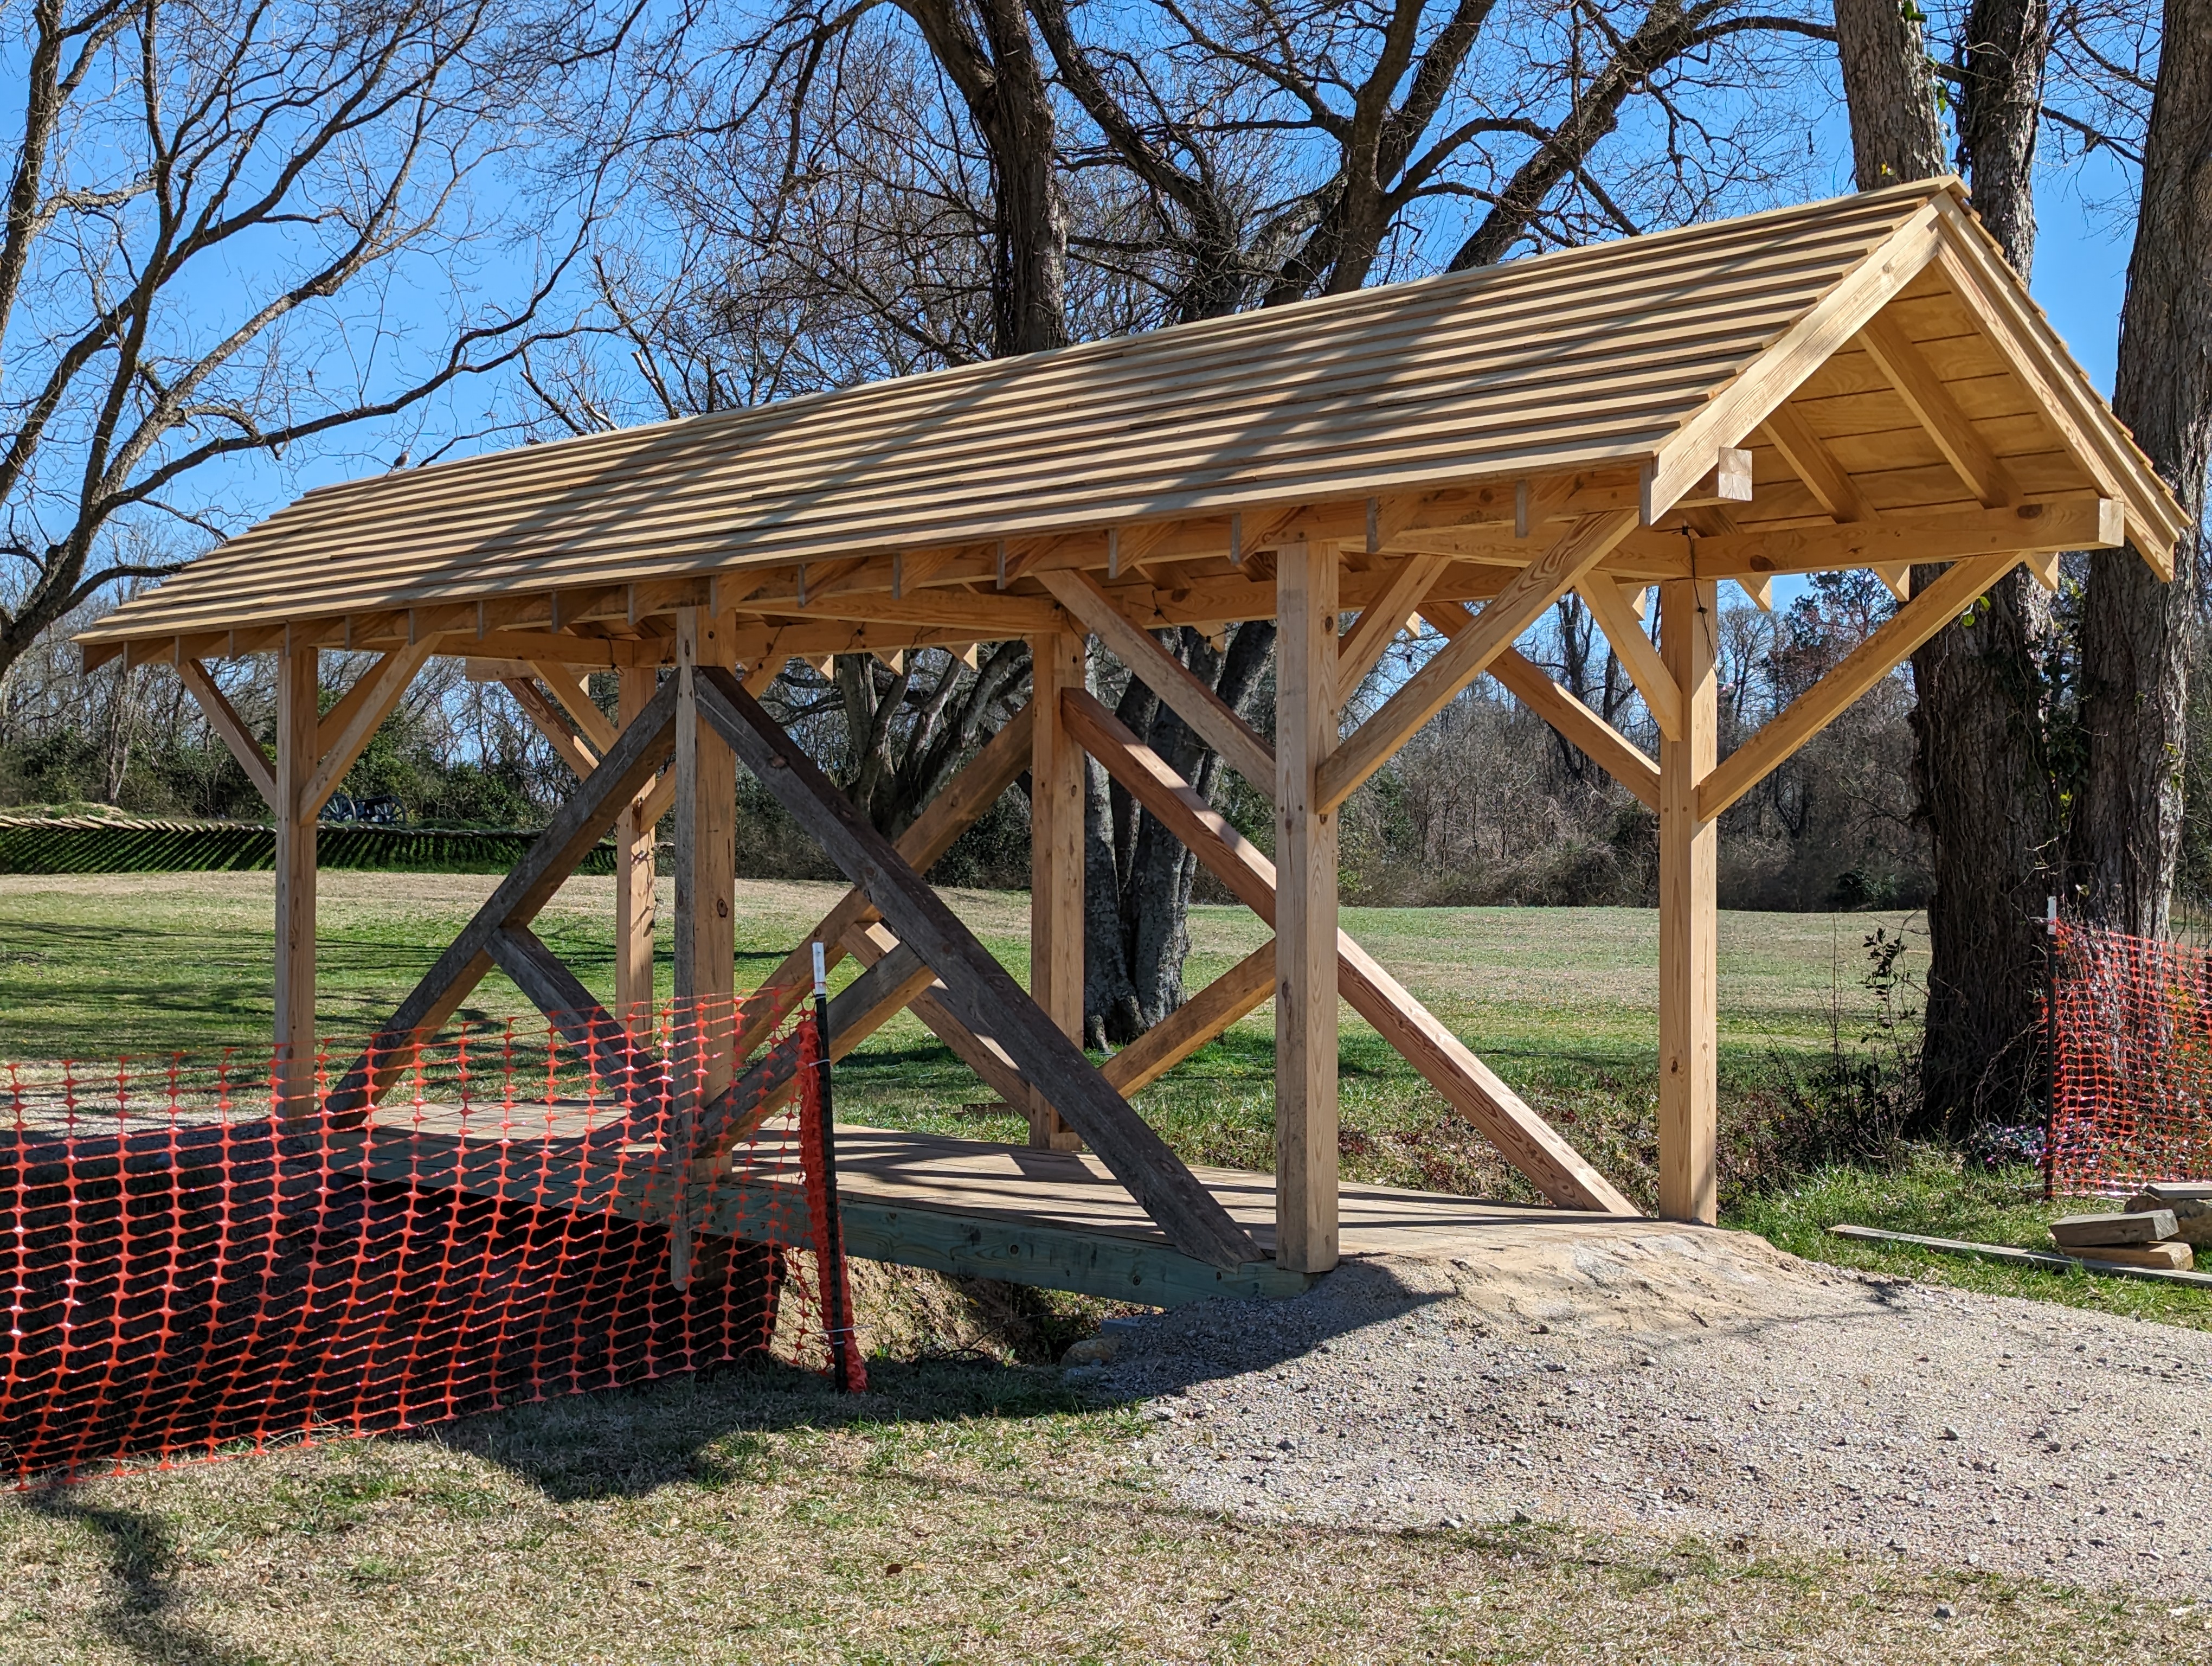
Meandering through the center of the campus of Historic Camden is a young Grand Canyon. It’s only about 10 feet deep and 16 feet wide at the top, but water is always running. Sometimes much more than a little but there is always a flow. The old footbridge that spanned this ditch was in need of replacement so I designed a covered bridge using a king-post truss as its main support element. One truss on each side would support the floor and the roof. The bridge uses the same jointery that would have been used here in the colonies in the 18th century, that is mortise and tenon that is pinned together. It’s also known as “Timber Frame” construction. All of the down-ward pressure of all of the elements is transferred to these locked joints and out to the two concrete pads at either side without the benefit of a single nut and bolt or lag, strap, or bracket. It’s all wood.
Because of the difficulty of assembling a large-timber truss from the bottom of a ditch, I decided to assemble the trusses and the floor beams off to one side. We would have a crane lift it in place later on.
The newly formed “Historic Camden Woodworkers Guild” was excited to be instrumental in the build. All of the wood used (except the sheathing) was milled locally at The Boykin Tree Farm. My thanks to Tom Russell and his men for their fine work.
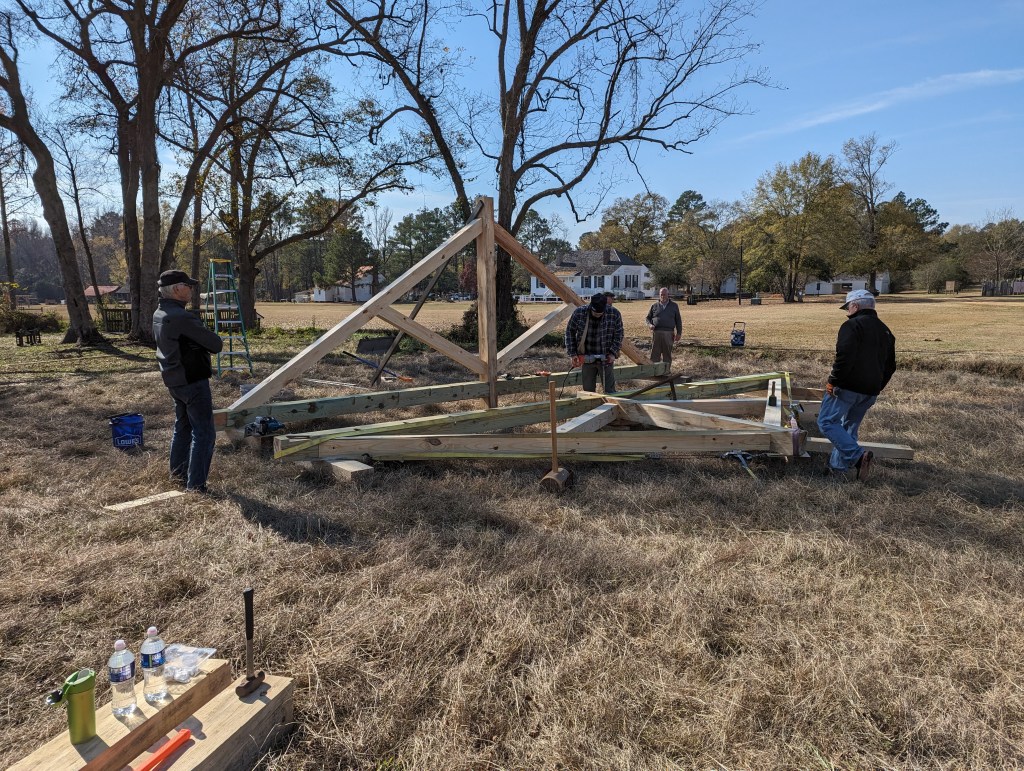
Here both trusses are assembled and the first floor beams are placed. Note the “U” shapes cut into the side beams. These are dovetails that correspond with the ends of the floor beams. It is a very strong way to connect two beams and one that gets tighter as it is pushed down.
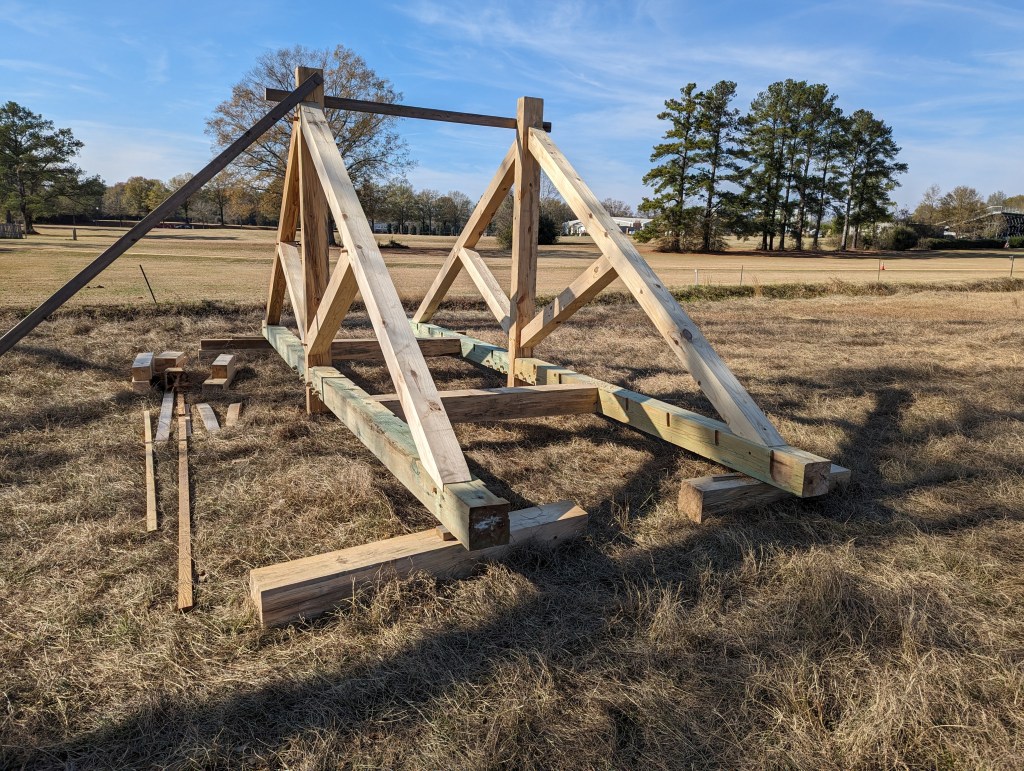
Here the floor beams are in.
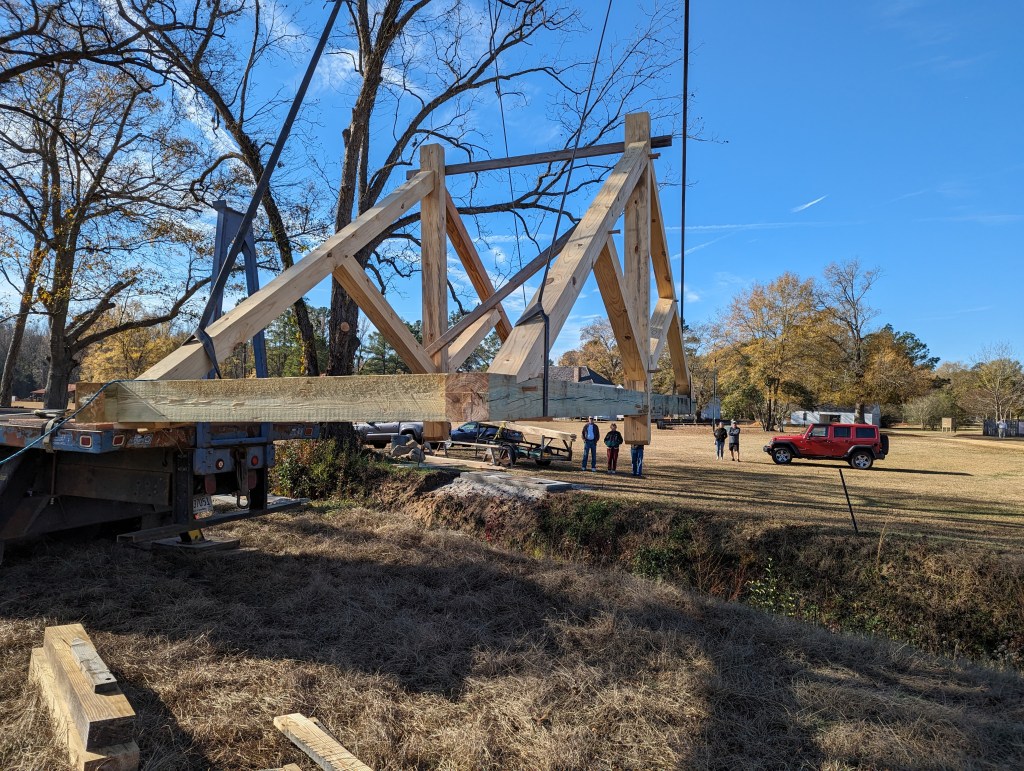
The crane had no trouble lifting the trusses.
The bridge comfortably spans the ditch.

The floor boards were installed.
The next step was to cut and assemble the beams that would support the roof rafters. One can see some of the pins that are employed to keep the joints together.
When designing the bridge I sought to keep the lines of the beams and braces parallel. This resolved into a 5 foot overhang on each end of the bridge.


The rafters were lapped and pinned.
This is when the tricky part began. We had to safely put the roofing on from the ends and the sides. We built supports for the scaffold legs and secured them so they wouldn’t move. The platform went from end to end on one side.
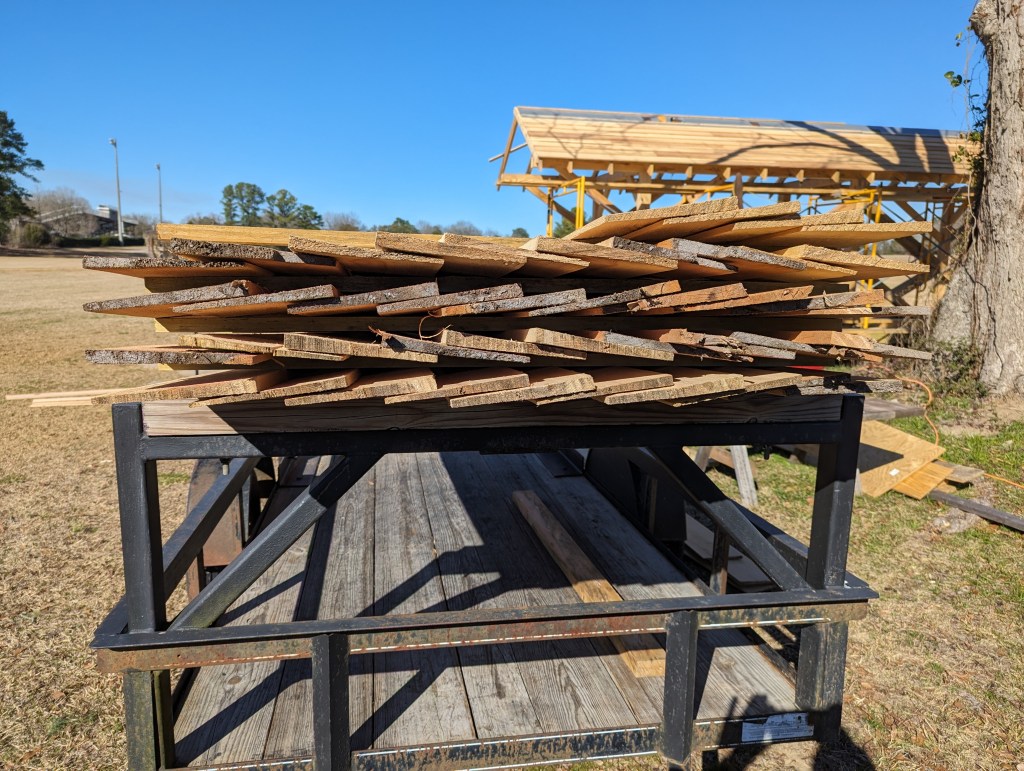
We applied a layer of sheathing (with modern nails), synthetic felt (applied with modern staples) and finished with Cypress clapboard cut by the same local sawmill.
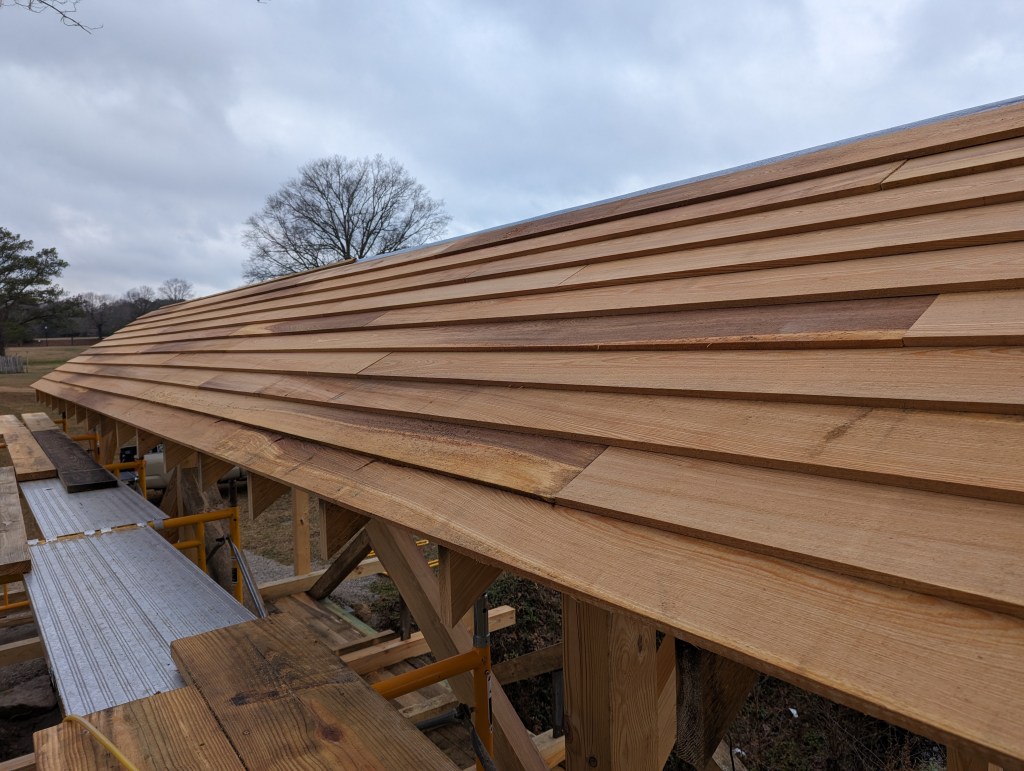
Once the first side was done we moved the scaffolding to the other side and repeated the procedure.
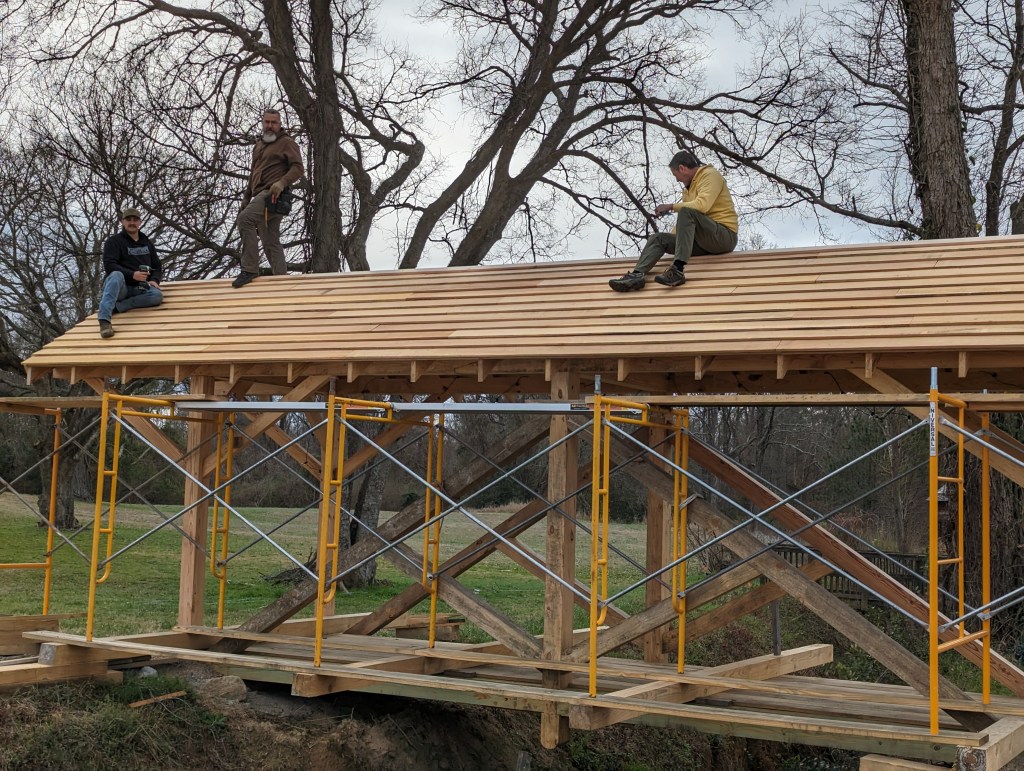
All that remained was to sign the work and begin the next build for Historic Camden.

Excellent work. Always so enjoy the commentary of the journey from beginning to completion. On to the next
Thanks Jonathan for your kind words.